.NET 10 CRUD: Build a Minimal API with EF Core in 30 Minutes

In this guide, we will walk through building an ASP.NET Core 10 Web API with Entity Framework Core from scratch.
Let’s get started!
If you want a video-version of this article, watch here on YouTube:
Watch the Video: .NET 10 CRUD API in 30 minutes
We will leverage the power of Minimal APIs to drastically reduce boilerplate code. By the end of this tutorial, you will have a fully functional backend connected to SQL Server, capable of handling all standard CRUD (Create, Read, Update, Delete) operations.
Let’s get started!
Prerequisites
Before we begin, ensure you have the necessary tools installed:
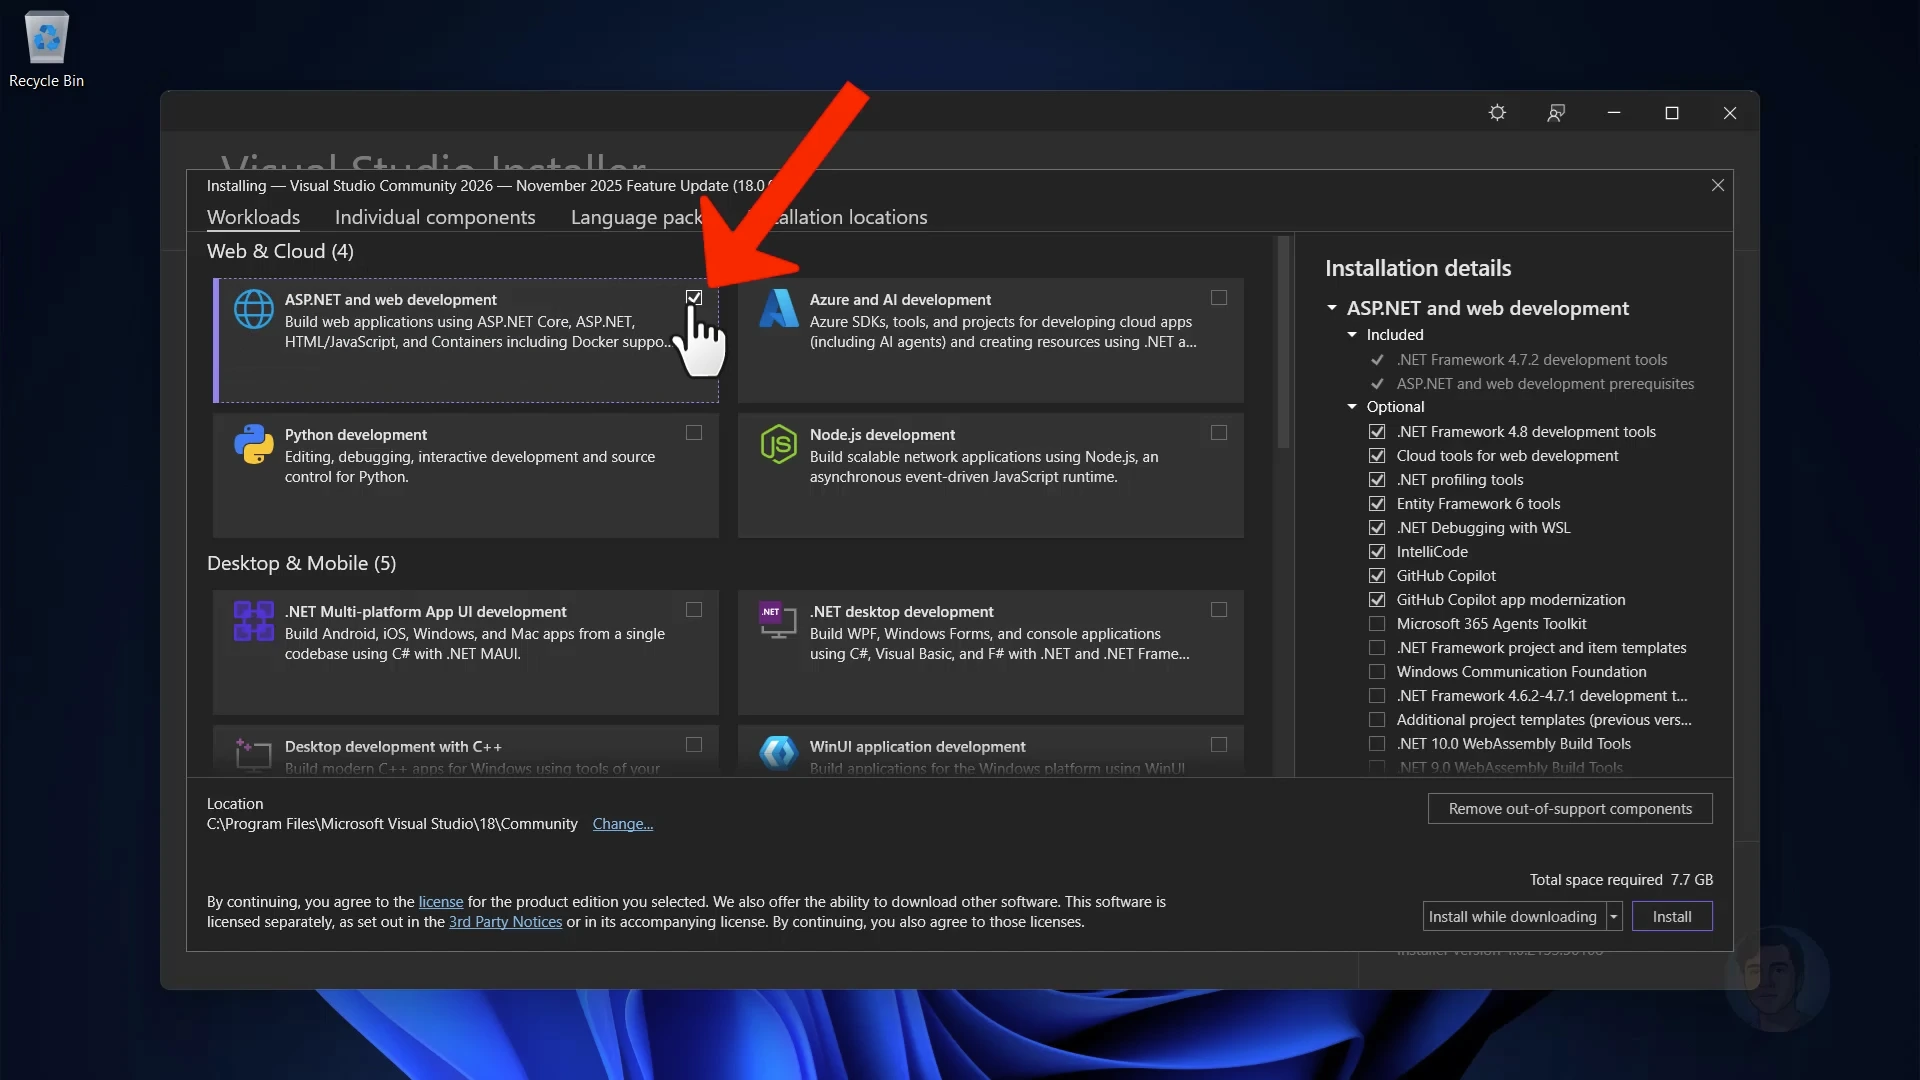
- Visual Studio 2026: Download from
visualstudio.microsoft.com. - Workloads: During installation, select ASP.NET and web development.
- Individual Components: Ensure SQL Server Express 2025 LocalDB is selected.
Step 1: Create a New Project
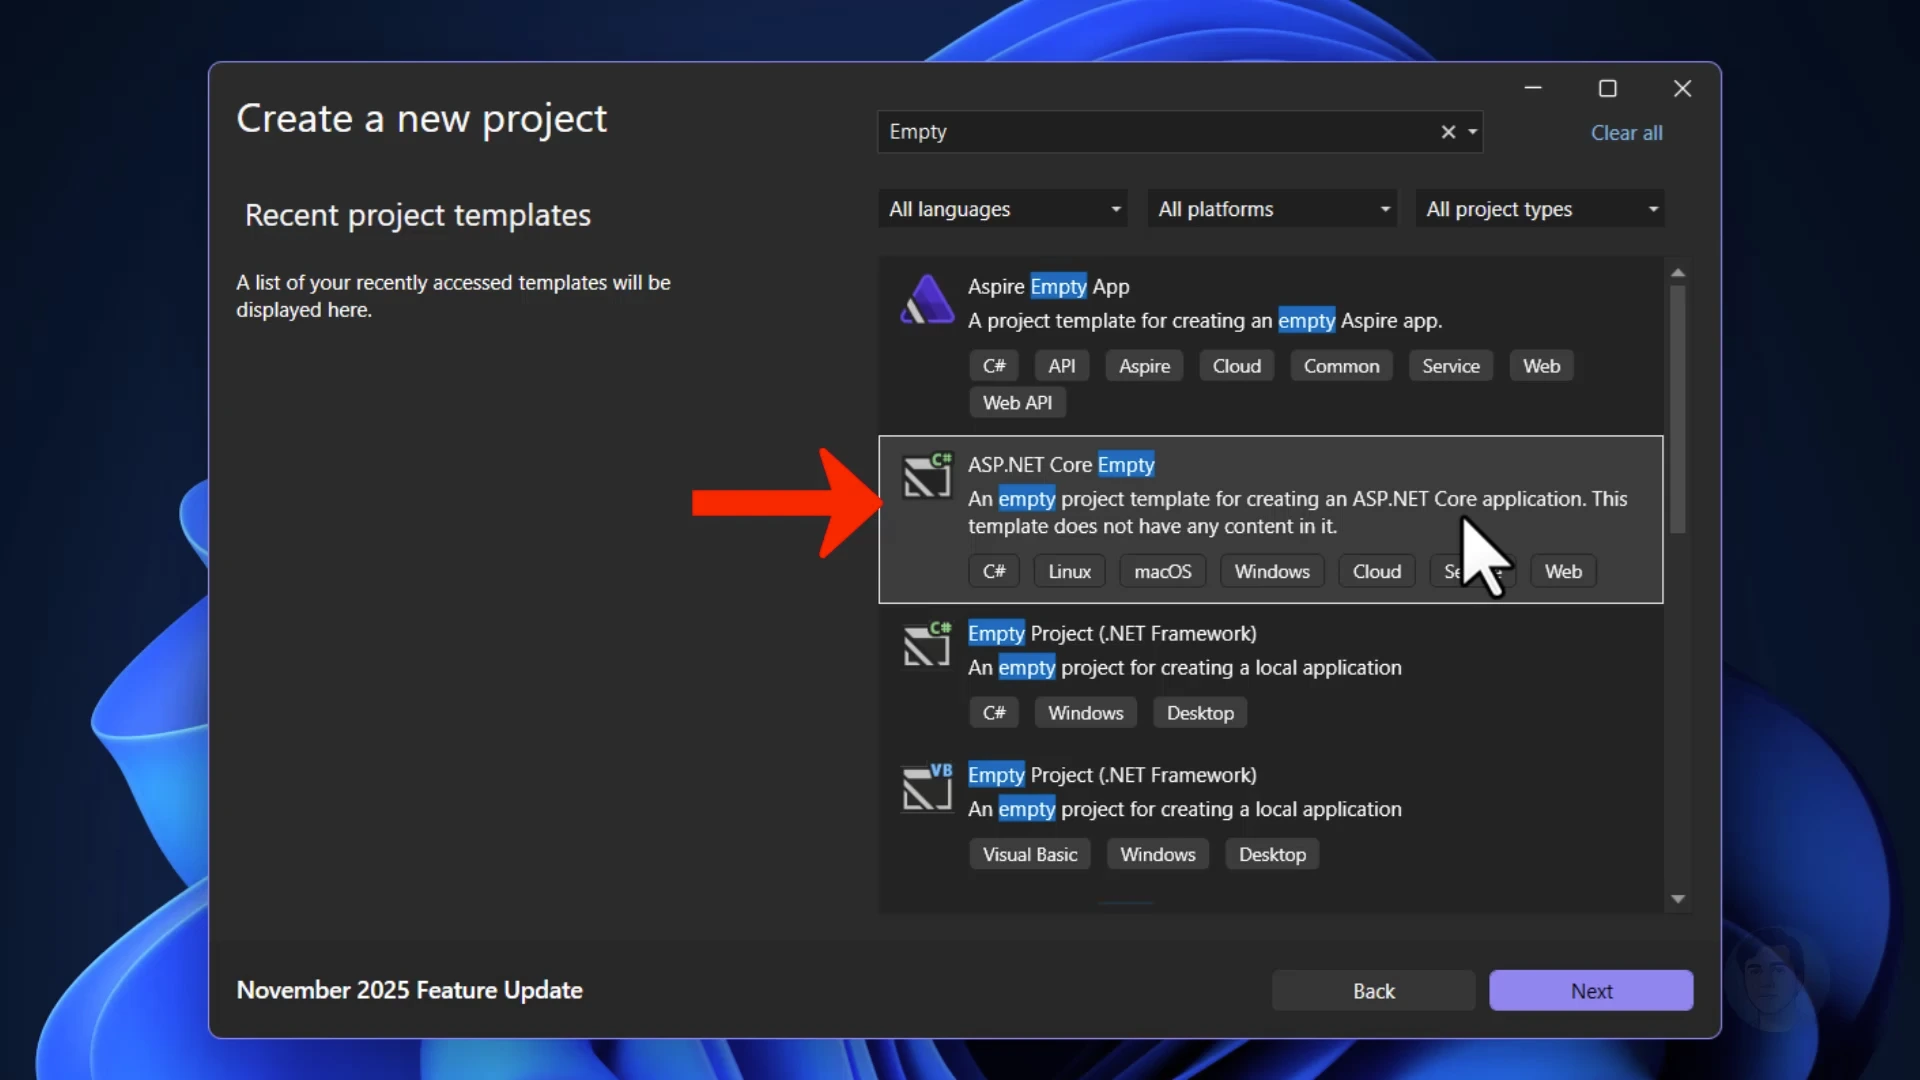
- Open Visual Studio and click Create a new project.
- Search for “Empty” and select the ASP.NET Core Empty template.
- Name the project
SimpleBookCatalog. - Select .NET 10 as the framework.
- Keep Configure for HTTPS checked.
- Ensure Use the .dev.localhost TLD in the application URL is selected.
Click Create.
Step 2: Understanding the Startup Code
The Program.cs file contains the application startup code. In .NET 10 Minimal APIs, this is where we register our Dependency Injection services, middleware components, and endpoints.
Initially, it defaults to a “Hello World” endpoint:
var builder = WebApplication.CreateBuilder(args);
var app = builder.Build();

app.MapGet("/", () => "Hello World!");

app.Run();
To test this, we can use the HTTP File support in Visual Studio:
- Right-click the project > Add > New Item.
- Search for HTTP and add a new file.
- Create a
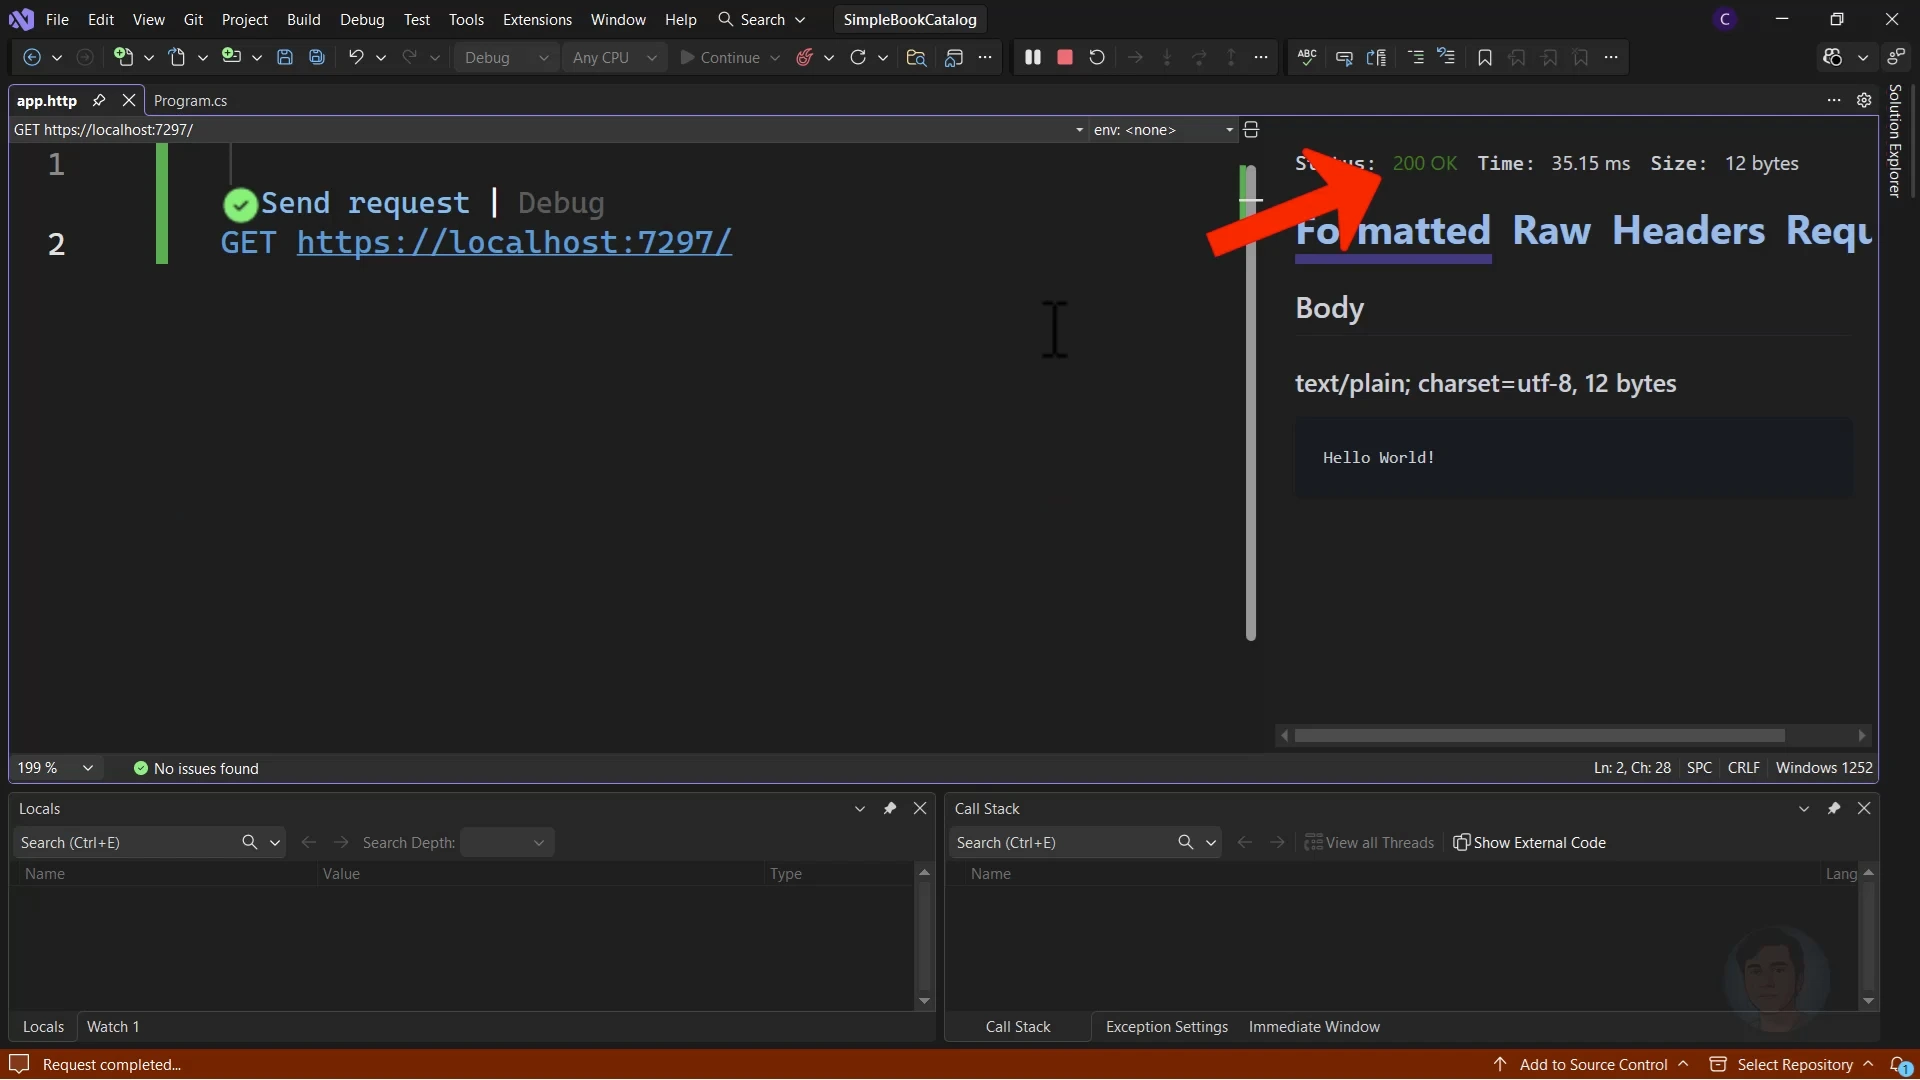
GETrequest to your application URL.
GET https://localhost:7297/Replace the above port number 7297 with the one that is present in your launchSettings.json file - it will be found in the applicationUrl setting, under the https profile.
Running this request should return a 200 OK with “Hello World!”.
Step 3: Define the Data Model
We need a model to represent our data.
- Right-click the project, and create a folder named
Models. - Add a class named
Book.cs.
public class Book
{
    public int Id { get; set; }
    public string Title { get; set; } = string.Empty;
    public decimal Price { get; set; }
}
Adding Validation
To ensure data integrity, we can use Data Annotations. Update Program.cs to enable validation services. This is new in .NET 10:
builder.Services.AddValidation();Then, simply apply attributes to your model.
Add the [Required] attribute to the Title property in Book.cs:
using System.ComponentModel.DataAnnotations;

public class Book
{
    public int Id { get; set; }

    [Required]
    public string Title { get; set; } = string.Empty;

    public decimal Price { get; set; }
}
Step 4: Setting Up Entity Framework Core
We will use Entity Framework Core with SQL Server LocalDB.
Install NuGet Packages
Open the Package Manager Console and run the following commands:
Install-Package Microsoft.EntityFrameworkCore.SqlServer
Install-Package Microsoft.EntityFrameworkCore.Tools
Create the Database Context
Create a folder named Data and add a class named SimpleBookCatalogDbContext:
using Microsoft.EntityFrameworkCore;
using SimpleBookCatalog.Models;

public class SimpleBookCatalogDbContext : DbContext
{
    public SimpleBookCatalogDbContext(DbContextOptions<SimpleBookCatalogDbContext> options)
        : base(options) { }

    public DbSet<Book> Books { get; set; }

    protected override void OnModelCreating(ModelBuilder modelBuilder)
    {
        modelBuilder.Entity<Book>(b =>
        {
            b.Property(x => x.Title).IsRequired().HasMaxLength(200);
            b.Property(x => x.Price).HasPrecision(18, 2);
        });
    }
}
Configure Connection String
In appsettings.Development.json, add your connection string:
"ConnectionStrings": {
  "DefaultConnection": "Server=(localdb)\\mssqllocaldb;Database=SimpleBookCatalog;Trusted_Connection=True;MultipleActiveResultSets=true"
}
Next, register the context in Program.cs before builder.Build():
var connectionString = builder.Configuration.GetConnectionString("DefaultConnection");

builder.Services.AddDbContext<SimpleBookCatalogDbContext>(options =>
    options.UseSqlServer(connectionString));
Migrations
Create the database schema by running these commands in the Package Manager Console:
Add-Migration Initial
Update-Database
Step 5: Implementing CRUD Operations
Now, let’s implement the API endpoints in Program.cs.
1. Create (POST)
We use MapPost to handle data creation.
app.MapPost("/books", async (Book book, SimpleBookCatalogDbContext context) =>
{
    context.Books.Add(book);
    await context.SaveChangesAsync();

    return Results.Created($"/books/{book.Id}", book);
});
2. Read All (GET)
We use MapGet to retrieve the list of books.
app.MapGet("/books", async (SimpleBookCatalogDbContext context) =>
{
    return await context.Books.ToListAsync();
});
3. Read by ID (GET)
We fetch a single book by its ID, returning NotFound if it doesn’t exist.
app.MapGet("/books/{id}", async (int id, SimpleBookCatalogDbContext context) =>
{
    var book = await context.Books.FindAsync(id);
    return book is not null ? Results.Ok(book) : Results.NotFound();
});
4. Update (PUT)
We use the efficient ExecuteUpdateAsync method available in newer EF Core versions to update records without retrieving them first.
app.MapPut("/books/{id}", async (int id, Book updatedBook, SimpleBookCatalogDbContext context) =>
{
    var rowsAffected = await context.Books
        .Where(b => b.Id == id)
        .ExecuteUpdateAsync(updates =>
            updates.SetProperty(b => b.Title, updatedBook.Title)
                   .SetProperty(b => b.Price, updatedBook.Price));

    return rowsAffected == 0 ? Results.NotFound() : Results.NoContent();
});
5. Delete (DELETE)
Similarly, we use ExecuteDeleteAsync for efficient deletion.
app.MapDelete("/books/{id}", async (int id, SimpleBookCatalogDbContext context) =>
{
    var rowsAffected = await context.Books
        .Where(b => b.Id == id)
        .ExecuteDeleteAsync();

    return rowsAffected == 0 ? Results.NotFound() : Results.NoContent();
});
Step 6: Testing the API
Use the .http file we created earlier to test all operations together.
Create a Book:
POST {{address}}/books
Content-Type: application/json

{
  "title": "ASP.NET Core in Action",
  "price": 37.00
}
Get All Books:
GET {{address}}/booksUpdate a Book:
PUT {{address}}/books/1
Content-Type: application/json

{
  "title": "ASP.NET Core in Action (Updated)",
  "price": 45.00
}
Delete a Book:
DELETE {{address}}/books/1Conclusion
We have successfully built a full CRUD Web API using .NET 10 Minimal APIs and Entity Framework Core in under 30 minutes! This modern approach has reduced our boilerplate code significantly, in comparison to using a controller-based approach.